FAQs: Iron Rebellion Mechs & Loadouts
- Justin spice
- Mar 5
- 4 min read

Choosing the right mech in Iron Rebellion can mean the difference between dominating the battlefield and getting wiped out in seconds.
While new pilots often search for the single “best” mech or loadout, the truth is more strategic: success depends on adapting your build to the map, objectives, and team composition.
This guide breaks down the most effective mech loadouts, explains how shields and EMPs work, and covers essential combat mechanics so you can make smarter decisions and stay competitive in every match.

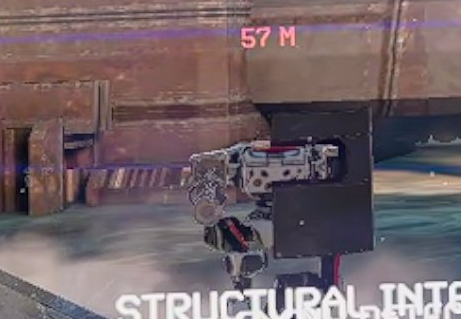
What are the mechs in Iron Rebellion?
Iron Rebellion features several mech classes, each designed for a specific battlefield role. Understanding what each mech excels at will help you choose the right loadout and support your team effectively.
Breaker – A versatile assault mech and the starting platform for new pilots. Breaker performs well in most combat situations and can call in an airstrike or temporarily overclock its movement systems for aggressive pushes or quick escapes.
E-Pulse – A disruption-focused mech equipped with an electromagnetic blast that can disable nearby enemy mechs, forcing them to reboot their systems. Excellent for breaking defensive positions and shutting down shielded targets.
Guardian – A defensive heavy mech capable of deploying a powerful directional energy shield. Ideal for protecting teammates, holding choke points, and anchoring defensive positions.
Reinforcer – A support-focused heavy mech that can deploy defensive turrets, resupply teammates, and act as a mobile spawn point for allied players. Reinforcers help teams maintain pressure and recover quickly after losses.
Recon – A fast scouting mech that deploys sensors to detect nearby enemies. Recon units provide valuable battlefield intelligence and help teams avoid ambushes.
Infiltrator – A stealth-focused mech capable of cloaking to sneak behind enemy lines. Infiltrators excel at flanking, sabotage, and surprise attacks on distracted opponents.
Each mech plays a different role, and the most successful teams use a mix of combat, support, and reconnaissance units to control the battlefield.
What’s the best mech/gun/augment?
There is no universal “best” combination, only the best for the situation. Some setups are good for close quarters, some for long range. Some are highly specialized for situations you rarely see. Try everything and find out what you like. There are many great combinations that work well.
Though one quick newbie tip: the starting combo of Breaker with dual Spitfires is one of the most capable loadouts in the game. Other mechs and weapons add more options to combat, but the Breaker/Spitfire is an all-around combo that stays strong in nearly any situation.
Can I change loadouts mid-match?
Yes! If your mech gets destroyed, push the LOADOUT button before the respawn timer goes to zero. You will be able to select from one of your presets or build a completely new one. When you are ready, click the REDEPLOY button to get back into the action.

How do I reload?
Weapons automatically reload when you empty the magazine, but if you want to manually reload before that happens, pull down on the right thumb stick. You won’t lose ammo in the magazine; it tops off.
What does "Reboot M-Drive" mean?
You've been hit by an enemy EMP blast. Your mech has shut down.
To reboot, flip all four startup switches back on. But beware - even after repair, expect cockpit sparks; you’ve been fried.

What are shields, and how do I counter them?
There are two shield types:
Bulkhead – Physical shield, blocks projectiles, doesn’t block explosive damage.
Guardian Energy Shield – Blocks projectiles and lasers; smoke and Hull Crackers pass through.
Each of the shields have strengths and weaknesses, but basically, they both block projectile weapons and lasers.


Should I specialize in one role?
No, do not limit yourself this way. If you only focus on one style of play or one class loadout, you are going to spend a lot of your time frustrated. To win a fight, you need to outplay your opponent. To win the match, you need to outplay the other team.
To consistently win:
Have one long-range build (example, Breaker/Spitfire)
One close-quarters build (example, Breaker/Grad 12)
When you are selecting your loadout, consider what your team needs. If your team is already full of Lights, consider being a Medium or Heavy and bring additional firepower. If your team is already stacked on firepower, consider playing Recon and placing scanners so they'll be able to more effectively direct it. While you might not be playing your favorite loadout, you score way more points and win more matches, which is a different kind of fun in itself.
What is the big red button?
There's a big red button on the control panel behind the left control stick. If you flip up the cover and push the button beneath it, you explode.
Yes, you self-destruct. No, it doesn't do damage to mechs around you - it doesn't keep the other team from scoring points, or anything else like that. You take the penalty (loss of a kill and -100 EXP) and go back to the loadout screen.
There are two times it is most useful.
If you ever find yourself stuck somewhere in a map, unable to move, or so lost you can't find your way back.
If the host started the match before you had time to pick the proper loadout.
IMPORTANT: Self-destructing costs your team points in some match types, so be careful when you choose to use it.

The Iron Rebellion FAQ guide was created by community member, GenericBeard, as part of a larger community guide on Steam. You can read the rest of the guide here.


Comments