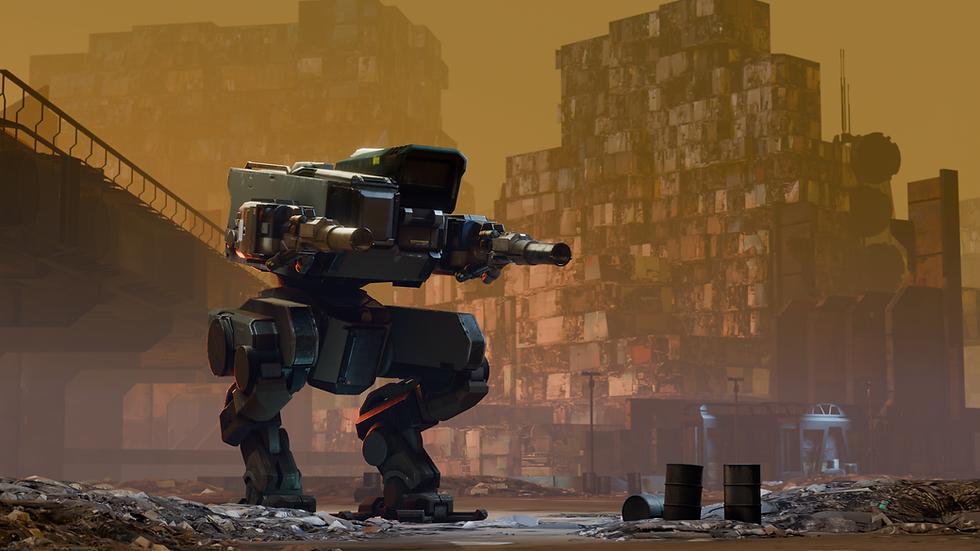
Iron Rebellion Mech Showcase: Guardian
- Justin spice
- Feb 7
- 3 min read
Updated: Apr 17
Guardian Overview

In the Guardian mech, you are the tallest and easiest unit to spot on the battlefield. As a result, you will likely take on a significant amount of incoming fire. The upside is that Guardian boasts substantial armor and access to deployable shield emitters capable of blocking most incoming damage, protecting both yourself and nearby teammates.
Guardian performs best in medium- to long-range engagements. At close range, you’ll often need support due to limited cockpit visibility and a slow turn rate. Unaugmented, the Guardian requires 9 seconds to complete a full 360-degree rotation, making positioning and awareness critical.
Cockpit Tip: Turn off your map display to improve low-angle visibility. (Also, yes, there’s a coffee pot back there.)
Stats (Unaugmented)
HP: 400 (6 sectors)
Max Walking Speed: 37
Max Sprint Speed: 103
Sprint Duration: 3s.
Static Jump Height: 12m
Jump Jet Duration: 3s
Boost Recovery: 3s
Turn Rate: 45 deg/s
Special Abilities

A1 - Static Shield
Requirements: 100 mass
The Guardian can deploy an emitter that projects a spherical energy shield in a 50m radius, which can block fast projectiles and laser weapons (hull crackers and smoke can still get through). Mechs, including enemies, can walk in and out freely. It lasts for 3 minutes or 2,400HP of damage blocked, whichever comes first. And, of course, if the emitter is destroyed, the shield collapses.
You can tell when a shield begins to weaken as it will turn red.
Tip: Don't wait until the first one fails to deploy the next. Deploy it before failure so you're never exposed.
The number of shields you can place is limited only by the mass you can access. If you expect your position to be directly attacked, it's a good idea to place multiple shields near each other, so when one fails, you can fall back.
Setting up over a repair pad adds a layer of safety for teammates while they repair.
A single shield can protect you from multiple airstrikes, though some splash damage will get through. However, it is unlikely you will survive a direct artillery strike.
Enemy EMP blasts will collapse the shield and destroy the emitter. Friendly EMPs will not.
Shields work well with reinforcer turrets protecting them as they fire, but be sure your shield encompasses the turret. A turret outside your shield will target enemies anywhere, even if that means trying to shoot through the shield, which will deplete it rapidly.
Your shield is just as useful to enemies who take it over. If you plan to move, consider destroying it if you think it will no longer benefit your team.
You don't need to be inside the shield to benefit from its protection. A few well-placed shields to block enemy firing lanes can completely negate snipers. Be careful not to shield your own team's fire, though!
A1 - Mobile Shield
Requirements: 50 mass
The Mobile Shield creates a force field around the Guardian that moves with you. It works the same way as the Static Shield (described above), with the important exception that it can only withstand 300HP of damage and lasts up to 30 seconds.
Use this shield when you need a little extra protection to move between cover positions or when ambushed. Be careful about blocking friendly lines of fire.
Augment Notes
All augments work on Guardian. In most combat scenarios, you will benefit greatly from the use of some of the mobility-related augments. The Mass Extractor augment pairs really well with the Mobile Shield, as you'll have a charge ready to use every 50 seconds.
The Iron Rebellion Mech Showcase series was created by community member, GenericBeard. Iron Rebellion works closely with the community to ensure that the game is continuously evolving and meeting the expectations of its playerbase.


Comments